Download calendar to excel. Creating a calendar in Microsoft Excel
Excel - A program often used by many office workers in everyday life. With it, you can create tables, create charts, quickly carry out complex calculations.
It has various analogs, including those included in the OpenOffice and LibreOffice software packages. But in terms of functionality, they cannot fully replace it.
Forming calendar in Excel
Sometimes in the process of work, the user has to create various objects in office applications. Excel is most suitable for this, since its functionality allows to combine calculations, textual component, graphics and much more. Therefore, to create a calendar, it is quite suitable.
Method 1: Calendar for the year manually
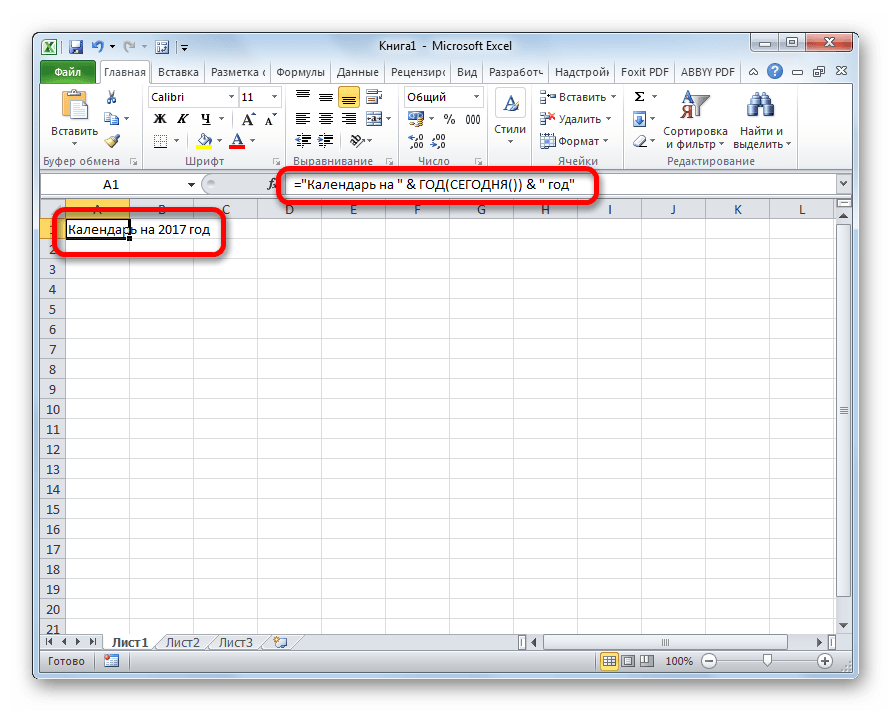
Method 2: Using formulas
Now consider a more complex way to create a calendar. It lies in the fact that you, as in normal work with Excel, form a table, then combine some cells, choose the design for them yourself, then write the appropriate formula in the cells that will have calendar days. In the example we create one month. The rest can be formed by analogy.
Method 3: Using a special template
Despite the fact that Excel is not a specialized program for creating calendars, it can easily cope with this task. In modern versions of this software, there are many templates that are very convenient to use in daily work. Some of them are just suitable for the implementation of the task.
After studying these methods, you can see that creating a calendar in Excel is not such a difficult task.
One common use of Excel is to create lists of events, meetings, and other calendar-related events. While Excel is able to easily process this data, it does not have a quick way to visualize this information. We need a bit of creativity, conditional formatting, a few formulas and 3 lines of VBA code to create a nice, interactive calendar. Consider how we can implement all this.
I found this example on Chandoo.org and share it with you.
Interactive calendar in Excel
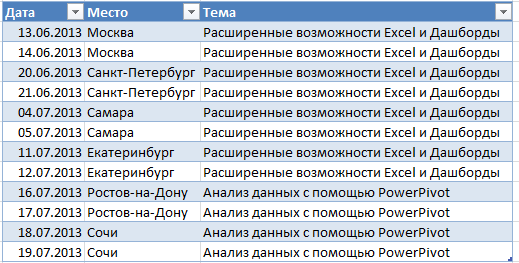
At the exit, we should have something like this:
Create a table with events
On the sheet Calculations create a table with all events
Customize the calendar
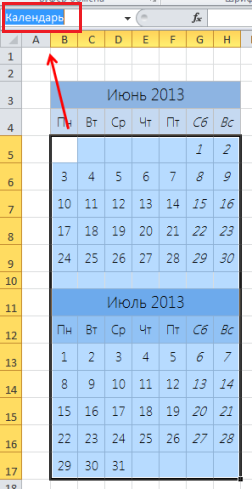
Since all events take place within two months, I simply entered the first date of the first month, stretched it down and formatted it to look like a calendar. At this stage, it should look like this.

Set the name of the date range in the calendar
It's simple, select the entire date range of our calendar and in the field. Name set the "Calendar"
Determine the cell with the selected date
On the sheet Calculationsselect an empty cell and give it the name "Selected Cell". We will use it to determine the date the user has chosen. In our case, this is cell G3.
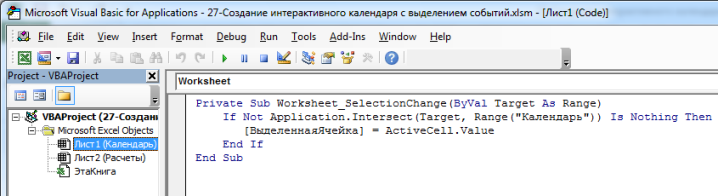
Add a macro to the Worksheet_selectionchange () event
The code described below will help identify when a user has selected a cell in the “Calendar” range. Add this code to the sheet with the calendar. To do this, open the VBA editor by pressing Alt + F11. Copy the code below and paste its Sheet1.
1 | Private Sub Worksheet_SelectionChange (ByVal Target As Range) |
Customize formulas to display details when choosing a date
Changing the date on the calendar leads to a change in 4 display options in the announcement: name, date, place and description. Knowing that the date is in the cell “Selected Cell”, we use the formulas, and ERROR to determine these parameters. The formula logic is as follows: if an event exists on the selected date, returns the data of this event, otherwise returns an empty cell. Formulas with the definition of the event parameters are on the sheet Calculations in cells G10: G13.
Adding an announcement
Finally add to sheet The calendar 4 elements Inscriptionand linking them to the data in cells G10: G13 sheet Calculations.
Tip:in order to bind the cell value to the element Inscriptionjust select the item, type G10 in the formula bar and click Enter.
Customize conditional formatting for the selected date.
Finally, add conditional formatting to highlight dates with calendar events.
Select a date range in the calendar.
Go to tab the main to group Styles -\u003e Conditional Formatting -\u003e Create Rule
Unfortunately, in the standard Excel package there is no Calendar add-in. And if you have to often enter a variety of dates, and you want to do this by selecting them from the calendar - you have two choices. Urgently study VBA (Visual Basic for Applications), or use a ready-made add-in created by other users. Fortunately, there are a lot of them on the Internet.
I can advise as a version of the Windows Date Picker from Ron de Bruin. Rather convenient, it automatically picks up the national settings for displaying dates, and is built into the context menu. You can download it by going to the website of the author.
How to install the Windows Date Picker add-in in Excel 2007
Open the Excel options and in the "Add-ins" at the bottom click on the button "Go"
In the window that opens, click on the “Browse” button and specify the path to the WinDatePicker.xla file that you unpacked from the archive downloaded from the site.
Now in the right-click menu you have an additional item. 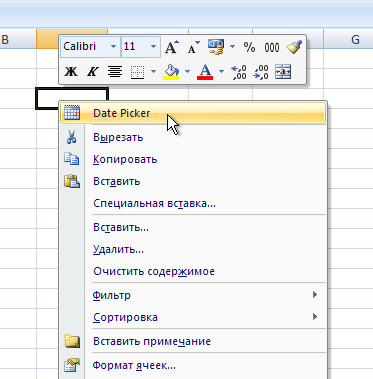
By selecting this item, you will receive a calendar that allows you to select and insert dates. 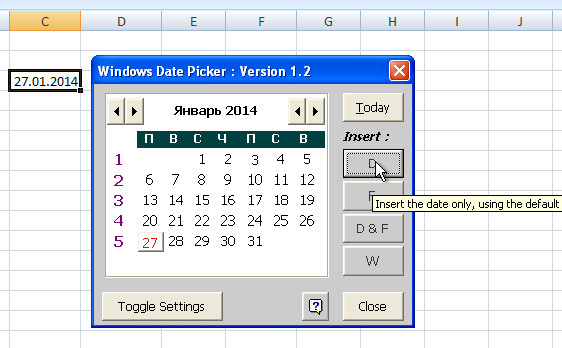
How to do it in Excel 2003
You can get to the add-ons through the menu "Service" 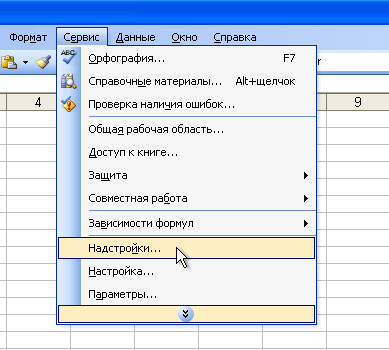
And then all the same.
Conquer Excel and see you soon!
Through the MS Office program, you can easily create a colorful calendar, for example in Excel, since it is very easy to create a calendar in Excel. Usually this will require a small table, a beautiful picture, 30 minutes of free time and no macros.
Step 1. Create a 7x8 table and fill it in the second line with the names of the days of the week: Mon, Tues, Wed and so on. Now copy and paste the resulting label twice to the right of the previous one, getting three identical labels in a row.
Step 2. Select all the columns of the sheet occupied by the three tables. If you started building the first table from cell A1, then the selected area will be from column A to column W. Now hover your mouse over the border of the extreme selected column and reduce its width to a value of 2.71. This is necessary in order to fit the future calendar on A4 paper, as well as for the convenience of subsequent work with it. Now we copy all 3 received tables and paste them into the line below the previous 3 times. Thus, a 3x4 grid consisting of 12 plates should turn out.
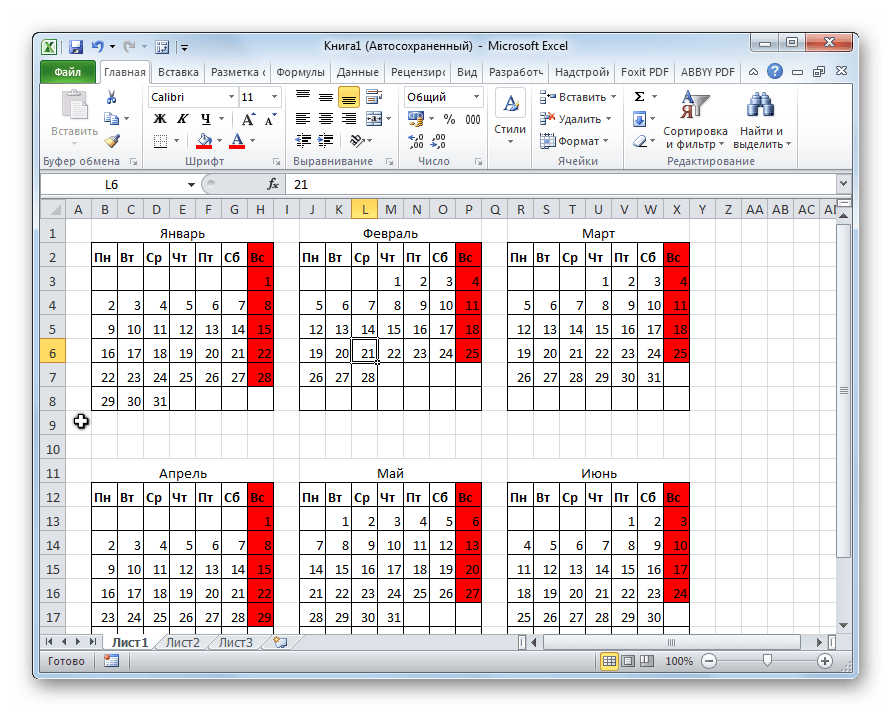
Step 3. Getting to fill the calendar. In each first cell of the table we enter the name of the months in order: January, February, March and so on. Now we fill the grid of each month with numbers corresponding to the days of the week. You can speed up the process with auto-complete. To do this, enter the first two numbers of the row or column, select the cells with numbers, left-click the black cross at the bottom corner of the outermost cell and drag it to the required column. The program will automatically add the missing numbers.
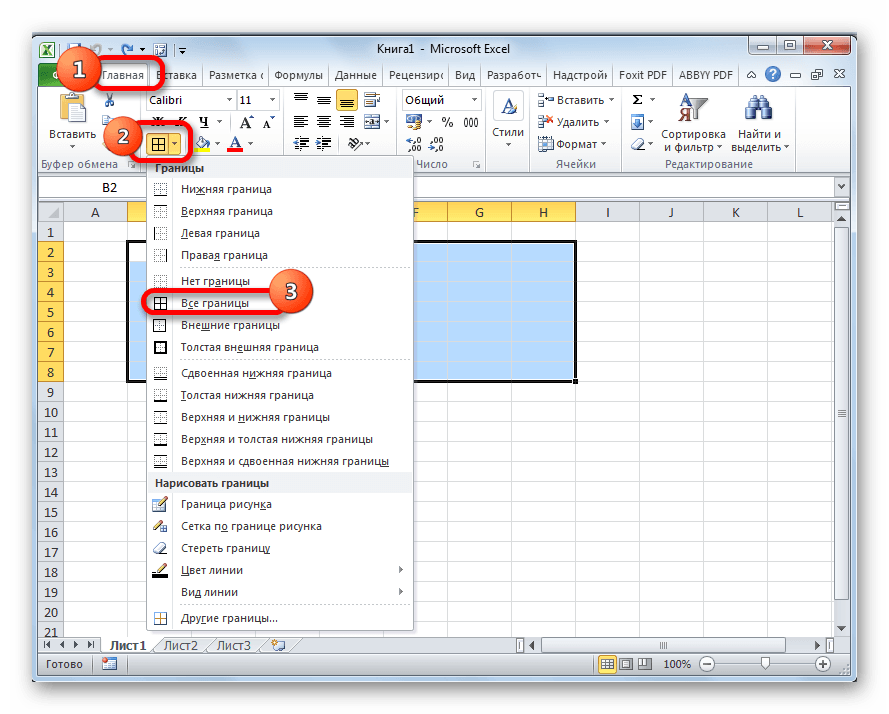
Step 4. Select the last two columns of each table in red using the Text Color command in the Main menu - Font. Now, in turn, select the top row of each table and in the Main menu select the Merge and Place command in the center, as well as the Boldface command in the Font menu. For convenience, remove the displayed grid Excel sheet. Go to the View menu and in the Show or hide tab remove the check mark from the Grid command.
Step 5. Create a beautiful background near our calendar. To do this, in the Insert menu, select the command Footer - Header - Picture. In the window that opens, specify the path to the image that you want to make the background of the calendar. If the selected image does not match the size of the page, then it can be adjusted to the desired size. To do this, move the mouse cursor over the page footer and select the Format Picture command in the Design menu. Now add the name or year to our calendar. To do this, on the Insert menu, select the WordArt command. A field will appear on the page in which we can write the desired text and select its color and appearance. We bring the resulting calendar to the ideal, playing with the design and arrangement of its elements. Calendar is ready.
When creating tables with a specific data type, it is sometimes necessary to use a calendar. In addition, some users just want to create it, print it and use it for domestic purposes. The Microsoft Office program allows you to insert a calendar into a table or sheet in several ways. Let's find out how this can be done.
All calendars created in Excel can be divided into two large groups: covering a certain period of time (for example, a year) and eternal, which will update themselves on the current date. Accordingly, the approaches to their creation are somewhat different. In addition, you can use a ready-made template.
Method 1: create a calendar for the year
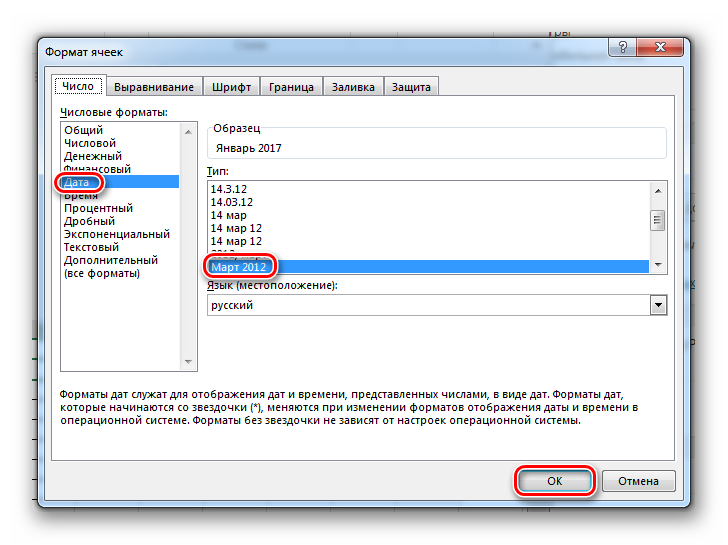
First of all, consider how to create a calendar for a particular year.
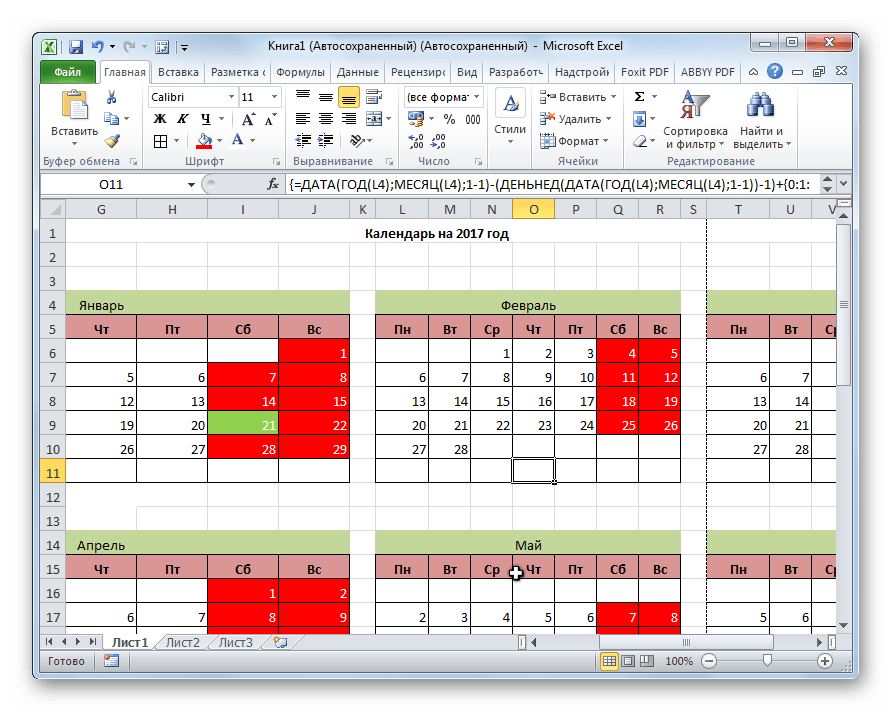
Method 2: Create a calendar using the formula
But, nevertheless, the previous method of creation has one significant drawback: it will have to be re-done every year. At the same time, there is a way to insert a calendar in Excel using a formula. It will be updated every year. Let's see how this can be done.
In general, the work on the creation of an "eternal" calendar is completed, although you can spend a long time on it a variety of cosmetic work, editing the appearance to your taste. In addition, you can separately select, for example, holidays.
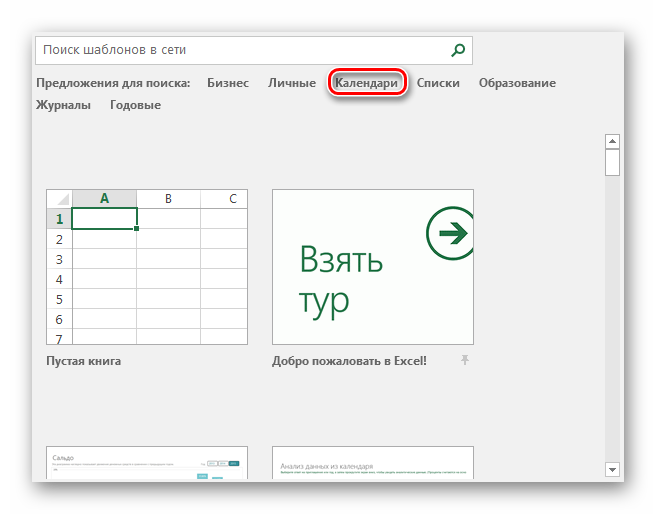
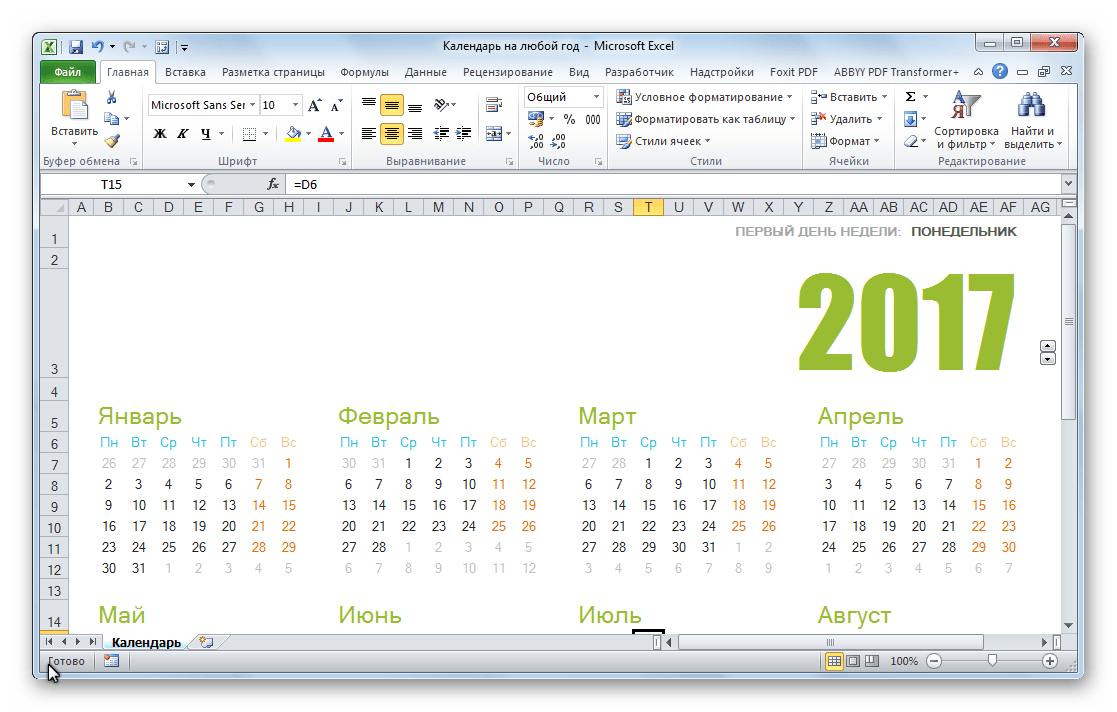
Method 3: use the template
Those users who still insufficiently own Excel or simply do not want to spend time creating a unique calendar can use the ready-made template downloaded from the Internet. There are quite a few such patterns in the network, and not only the number, but also the variety is large. You can find them by simply typing the corresponding query into any search engine. For example, you can specify the following query: “calendar Excel template”.
Note: In the latest versions of Microsoft Office, a huge selection of templates (including calendars) is integrated into the software. All of them are displayed directly when opening a program (not a specific document) and, for greater user convenience, are divided into thematic categories. It is here that you can choose a suitable template, and if you don’t find one, you can always download it from the official site.
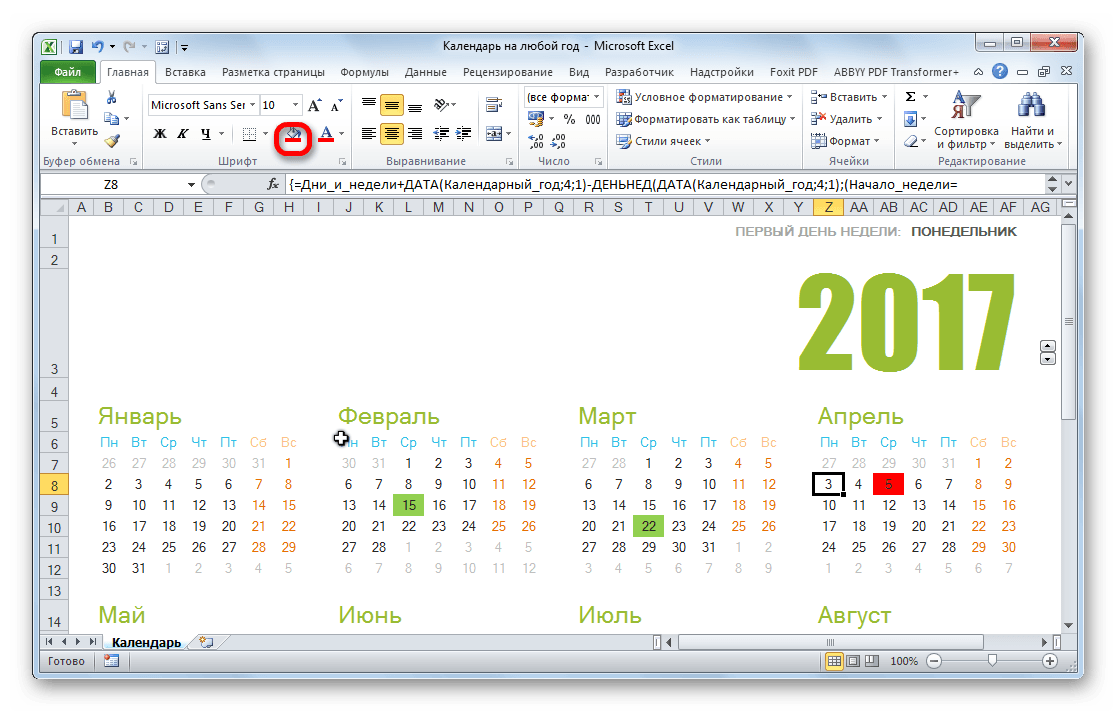
In fact, such a template is a ready-made calendar, in which you will only have to enter holiday dates, birthdays or other important events. For example, such a calendar is a template that is presented in the image below. It is a fully ready to use table.
You can in it using the fill button in the Home tab paint in different colors cells containing dates, depending on their importance. Actually, this is where all the work with such a calendar can be considered complete and you can start using it.
We figured out that the calendar in Excel can be done in two main ways. The first of these involves the performance of virtually all manual actions. In addition, the calendar made in this way will have to be updated every year. The second method is based on the use of formulas. It allows you to create a calendar that will be updated by itself. But, for the application of this method in practice, you need to have a greater knowledge base than when using the first option. Especially important will be knowledge in the field of application of such a tool as conditional formatting. If your knowledge in Excel is minimal, then you can use a ready-made template downloaded from the Internet.